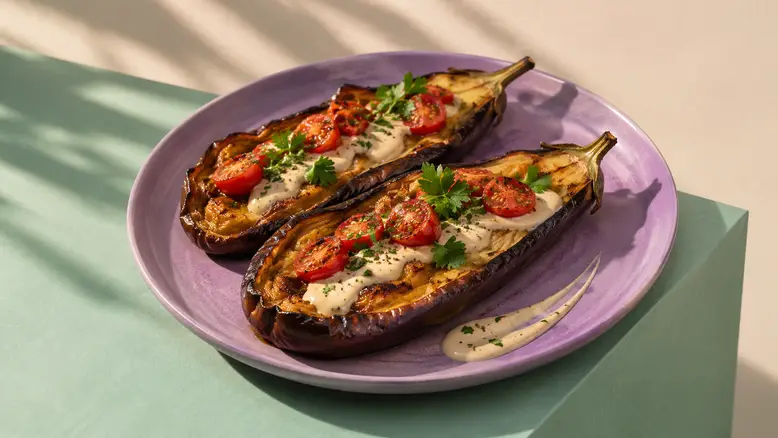
A menu photo already contains the most important part of a restaurant ad: the food a customer can actually order. The job is to turn that photograph into a short sequence that makes the dish easy to recognize, gives it an appetizing sense of movement, and ends with a clear next step.
Start with one dish and one offer. This guide uses roasted eggplant on a lavender plate to plan a short restaurant video without inventing a different meal between shots.
What makes a restaurant video ad work?
Food needs to look desirable and orderable. An attractive transformation that doubles the portion, changes the garnish, or turns a crisp surface into liquid creates the wrong expectation. Build the sequence around details the original photograph supports.
| Ad element | What to show | What to protect |
|---|---|---|
| Recognition | The complete plated dish | Portion, ingredients and serving vessel |
| Appetite | A close view of a real texture | Roast marks, sauce thickness and garnish |
| Action | One restrained movement | Plate position and believable food behavior |
| Conversion | An accurate offer and destination | Availability, price and ordering information |
A restaurant does not need a complicated story for every post. One readable food detail and one useful reason to act can carry a short ad.
Where PixTV fits into the workflow
Use the image canvas to prepare a consistent visual reference, the video canvas to develop individual moving shots, and the video editing canvas to assemble the sequence. Check the controls available in your current workspace before choosing a generation route.
Keep the approved menu photograph available throughout. Generated preparation images help plan a shot; they do not establish what the restaurant serves.
How to turn menu photos into a restaurant ad
1. Choose one dish and one customer action
For this example, the subject is two roasted eggplant halves with a tahini stripe, cherry tomatoes and parsley. The action is to view the restaurant's current menu. That gives every shot a job and keeps the ending specific.
Use a current dish photograph with permission. Confirm the pictured serving matches the available item. If a promotion appears, verify its dates and conditions with the restaurant before adding it.
2. Inspect the photograph before expanding it
Check focus, edges, sauce and shadows. A soft image cannot reliably establish fine texture. Photograph the real dish again when essential detail is missing. If you change the frame for a vertical ad, extend the background conservatively and keep the food itself unchanged.
Avoid adding ingredients to fill an empty corner. Empty space can hold the offer later.
3. Plan three shots with different purposes
Build a simple sequence: a complete plate to identify the dish, a texture close-up to create appetite, and a clean final plate with room for the call to action. A fork beside the plate can suggest a dining context without requiring an unreliable cutting or eating action.
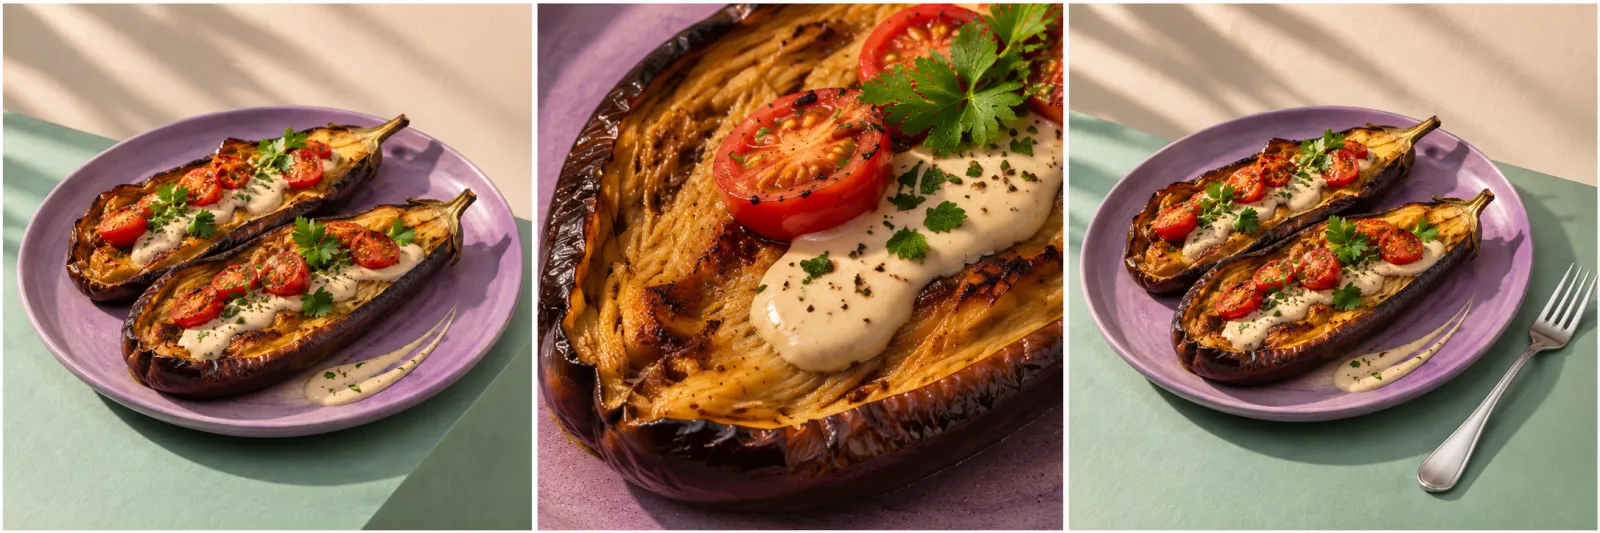
Shot plan: establish the serving, inspect the texture, then leave a clear ending for the menu message.
Approve the three frames together before generating movement. Check that the whole plate, close-up and ending show the same portion and plating, even though their framing serves different purposes.
4. Give each shot a restrained movement brief
Begin with the shot that has the clearest reference. Ask for one camera movement and a stable subject. For the complete plate, a small forward move is easier to judge than an orbit that reveals unseen food surfaces.
Slow, gentle push toward the lavender plate. Keep exactly two roasted eggplant halves, the existing tahini stripe, tomatoes and parsley unchanged. Soft side light reveals the roast texture. The plate stays still. No new ingredients, pouring action or changing portion.
Treat this as a starting brief. Inspect the result rather than assuming every instruction has been followed.
5. Review texture, motion and light together
Pause near the beginning, middle and end. Does the sauce remain on the same part of the eggplant? Do garnish leaves merge or multiply? Does the plate edge bend while the camera moves? Compare these moments with the source photograph.
Lighting should reveal the food's surface. Harder side light can emphasize roast marks; a softer setup may suit a smooth sauce. Avoid adding steam unless the real serving and shot context support it. Rework a failed shot with less movement or a stronger reference.
6. Assemble for the placement
Bring approved shots into the edit. Put the recognizable dish early, trim repeated movement, and place the message where it does not cover the food. Add prices, names and ordering text as editable text in the finishing workflow you actually use.
| Placement | Frame decision | Final check |
|---|---|---|
| Vertical feed or story | Keep the serving clear in a tall crop | Preview platform overlays and caption space |
| Square social post | Make the plate readable at thumbnail size | Check garnish and offer together |
| Landscape website slot | Use a wider composition | Test the real page crop and surrounding text |
Check the destination's current requirements before export. A single crop rarely serves every placement equally well.
7. Finish with an accurate offer
End with the restaurant name, a useful action and a working destination. “View the current menu” is clearer than an unsupported claim about a limited offer. Check the ad with the restaurant team before it goes live, including the pictured portion and any dietary wording.
Keep the first version small
Produce one complete sequence before making variations. If the whole plate and final frame work but the close-up changes the food, replace that close-up. Track usable shots and revision time when deciding whether the workflow saves effort. A beautiful rejected clip still belongs in the production cost.
For another product-led sequence, see the product B-roll workflow. The same discipline applies: each shot should add a different piece of information.
Start with the dish you already serve
Open PixTV, choose one approved menu photograph, and plan the recognition shot, texture shot and final message before generating motion. Keep the food accurate, then make the edit appetizing.
Frequently asked questions
Can I make an ad from one menu photo?
Yes, if it clearly shows the dish. Use restrained movement and crops supported by that view. A single photograph cannot verify hidden surfaces or a cutting action. Additional real photographs can provide stronger references when those details matter.
Should every food shot include steam?
No. Add steam only when it fits the actual serving and makes visual sense. Steam can obscure texture or imply a temperature the dish does not have. Light, framing and a gentle camera move can create appetite without it.
Can AI change the portion accidentally?
Yes. Ingredients, garnish and sauce can drift between frames. Compare the beginning, middle and end with the approved photo. Reject a shot that misrepresents the serving, even if its camera movement looks polished.
Where should I add menu prices?
Add them as editable text using verified information. Keep important text clear of the food and placement overlays. Review the exported version at phone size so the price and conditions remain readable.
How long should the ad be?
Long enough to identify the dish, show an appetite detail and communicate the next step. Start with the placement and message, then trim repetition. More generated seconds do not automatically make the food more convincing.
Can I reuse the same sequence everywhere?
Reuse approved shots when appropriate, but adapt the crop, text size and ending for each destination. Check the final placement preview. A landscape plate composition may lose important food detail when cropped into a tall mobile frame.