You have a product image that works. The composition is right, the lighting is clean, and only one detail needs changing. Start with that image in GPT Image 2.6 and describe a bounded edit. Then check the surrounding scene before approving the result.
This tutorial changes a mushroom lamp's coral shade to cobalt blue and prepares separate elements for compositing. Inpainting, transparent assets, and editable document layers serve different purposes. Treating them as separate steps keeps a small revision from turning into an uncontrolled redesign.
Start with one change
Open the PixTV image canvas, choose GPT Image 2.6, and add the original image as the editing reference. The working photograph has a coral ceramic shade, brass stem and base, green notebook, and white cube. Keep that source untouched.
Write the requested change before adding style instructions. “Recolor the shade” is a smaller task than “make a more premium product photograph.” The latter can invite new materials, a different room, or a changed lamp silhouette.
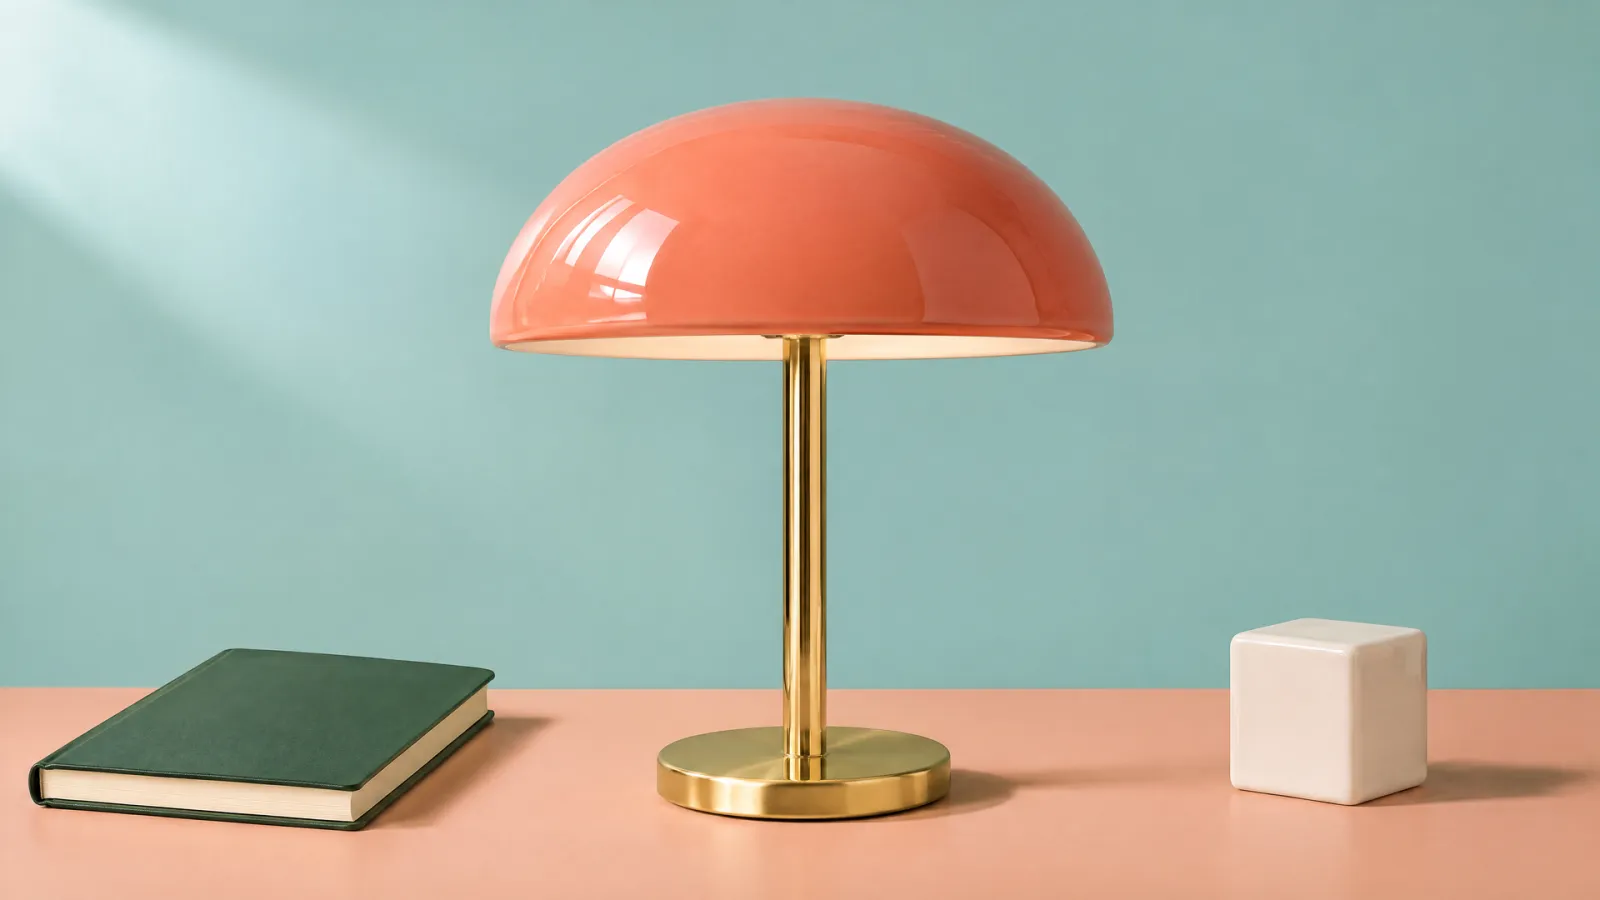
Source image. The notebook, cube, tabletop edge, and lamp base provide comparison points.
Recolor the shade with a focused edit
Change only the coral ceramic dome shade to saturated cobalt blue. Preserve its dimensions, curvature, glaze and highlight direction. Keep the brass stem and base, green notebook, white cube, peach tabletop, teal wall, camera and crop unchanged. Do not add objects or text.
Generate a candidate from the original reference. Compare the dome edge and stem alignment before judging the new color. A pleasing blue shade can still be the wrong revision if the base grows or the notebook shifts.
Name the source and candidate clearly, then review them at the same scale. Start with the unchanged objects at the edges of the frame and move toward the lamp. This catches a shifted composition before the new color distracts you. Keep a brief acceptance note: the requested difference is the shade color; changes in shape, object count, or camera position require another pass.
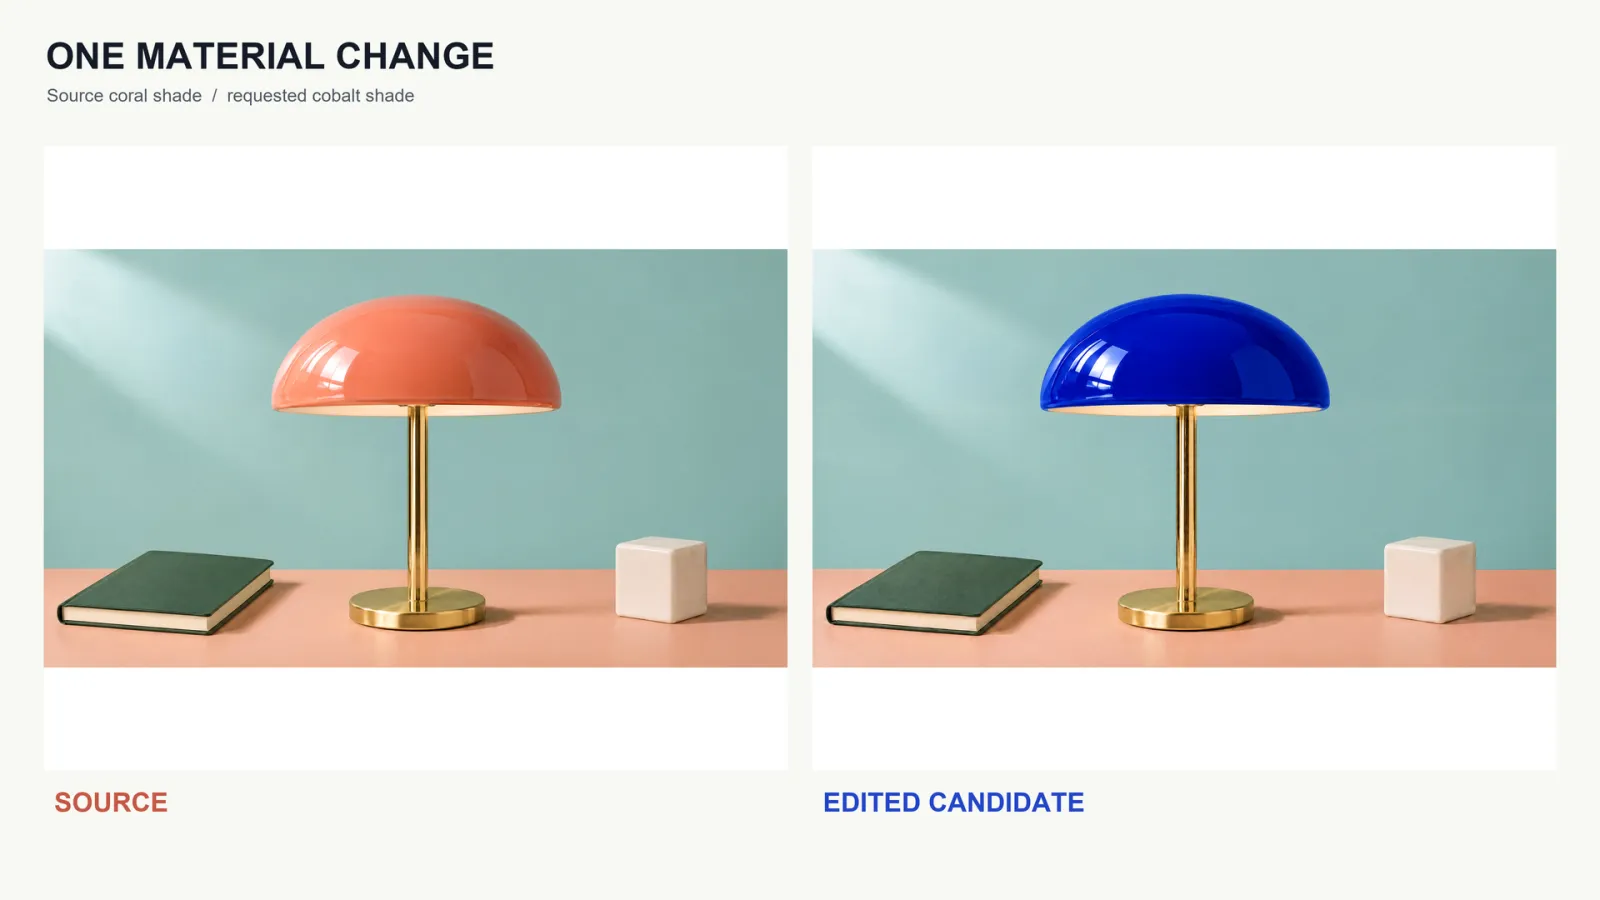
Side-by-side source and edit. Compare the surrounding objects as well as the recolored surface.
Use a selection when the editing surface supports it
If the interface you are using exposes a mask or marked editing area, select the shade and describe what belongs inside it. Avoid including the brass stem unless that also needs work. Preserve the source dimensions when preparing a selection overlay.
OpenAI's image-generation guide documents markup-guided editing for GPT Image 2.6. That API capability does not establish that every PixTV editing surface exposes the same controls. The supplied lamp revision uses an image reference and a focused text instruction; the area diagram illustrates scope rather than a saved mask used for that generation.
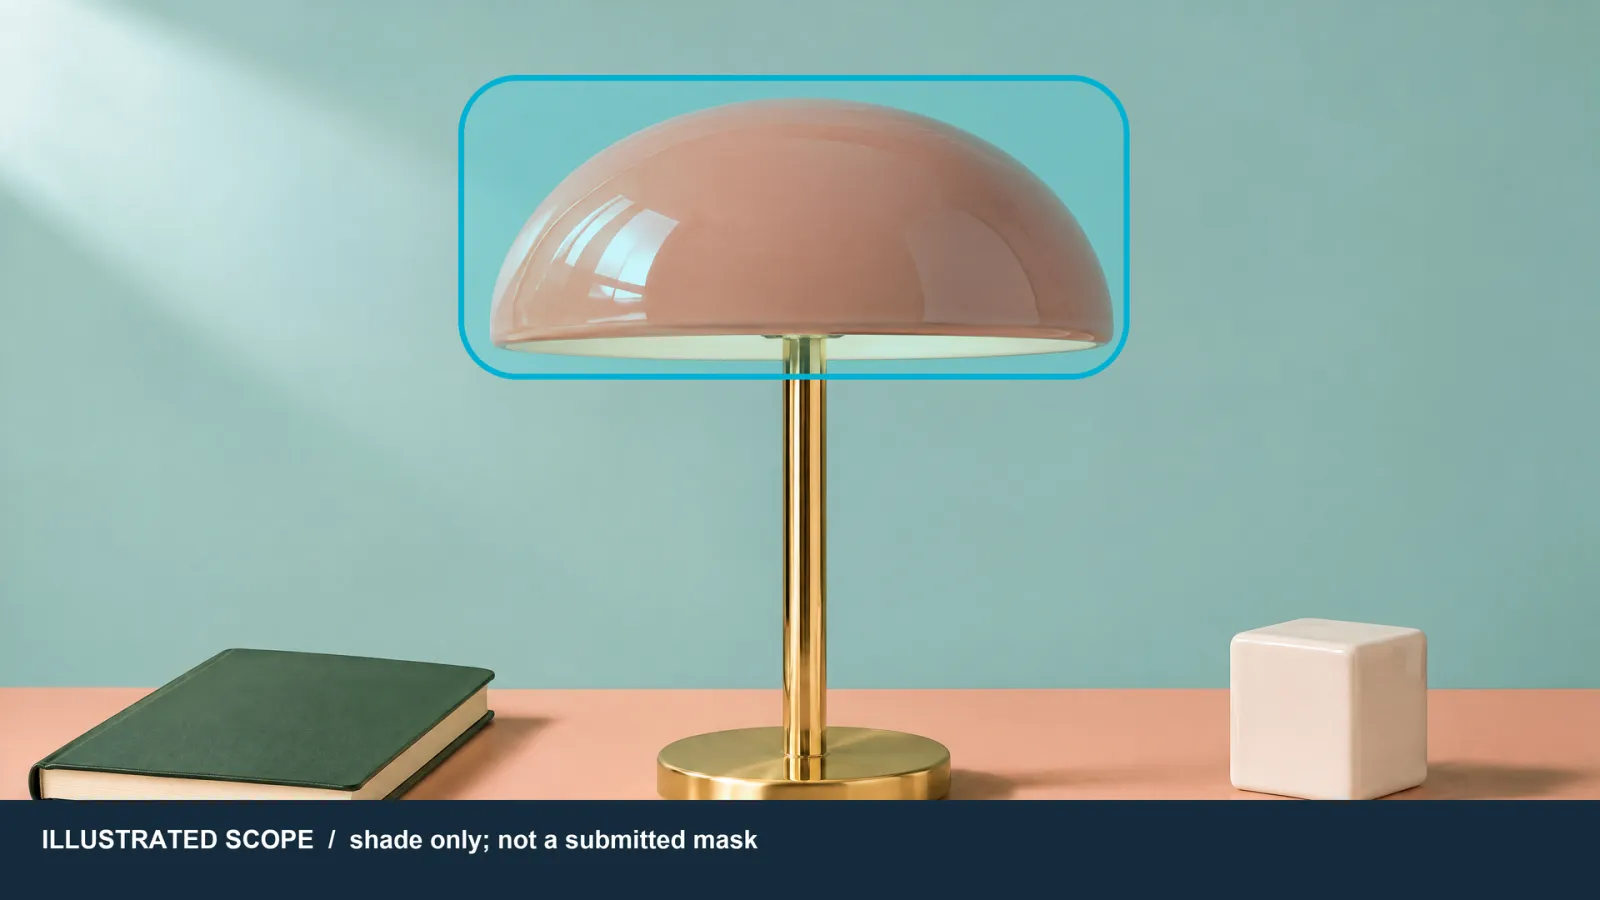
The overlay explains the intended editing region. It is a teaching annotation, not a captured PixTV mask interface.
Build layers from approved elements
An edited PNG is still one image. It does not become a Photoshop document with editable layers simply because you asked the model to separate objects. For a layered composition, prepare a clean background and an isolated foreground, then place them in an editor that supports layers.
| Element | How to prepare it | What to check |
|---|---|---|
| Background plate | Remove the lamp from a reference copy | Reconstructed wall and tabletop |
| Lamp foreground | Isolate the approved lamp as RGBA PNG | Outline and transparent surroundings |
| New composition | Place foreground over the plate | Scale, contact and lighting |
The clean plate removes the lamp while keeping the notebook and cube. The coral lamp foreground was extracted separately with background removal, then selected from the extracted objects. Check its geometry against the source before combining them. Background removal can change fine edges even when the main shape remains recognizable.
Reconstructing an empty background also involves a new image decision. Look for a believable continuation of the tabletop and wall rather than a blurred patch where the lamp stood. When replacing the lamp, match its original scale and vertical alignment first. Add or adjust a contact shadow for that placement separately. Keep each component named by its job so the background plate cannot be mistaken for a finished product photograph.
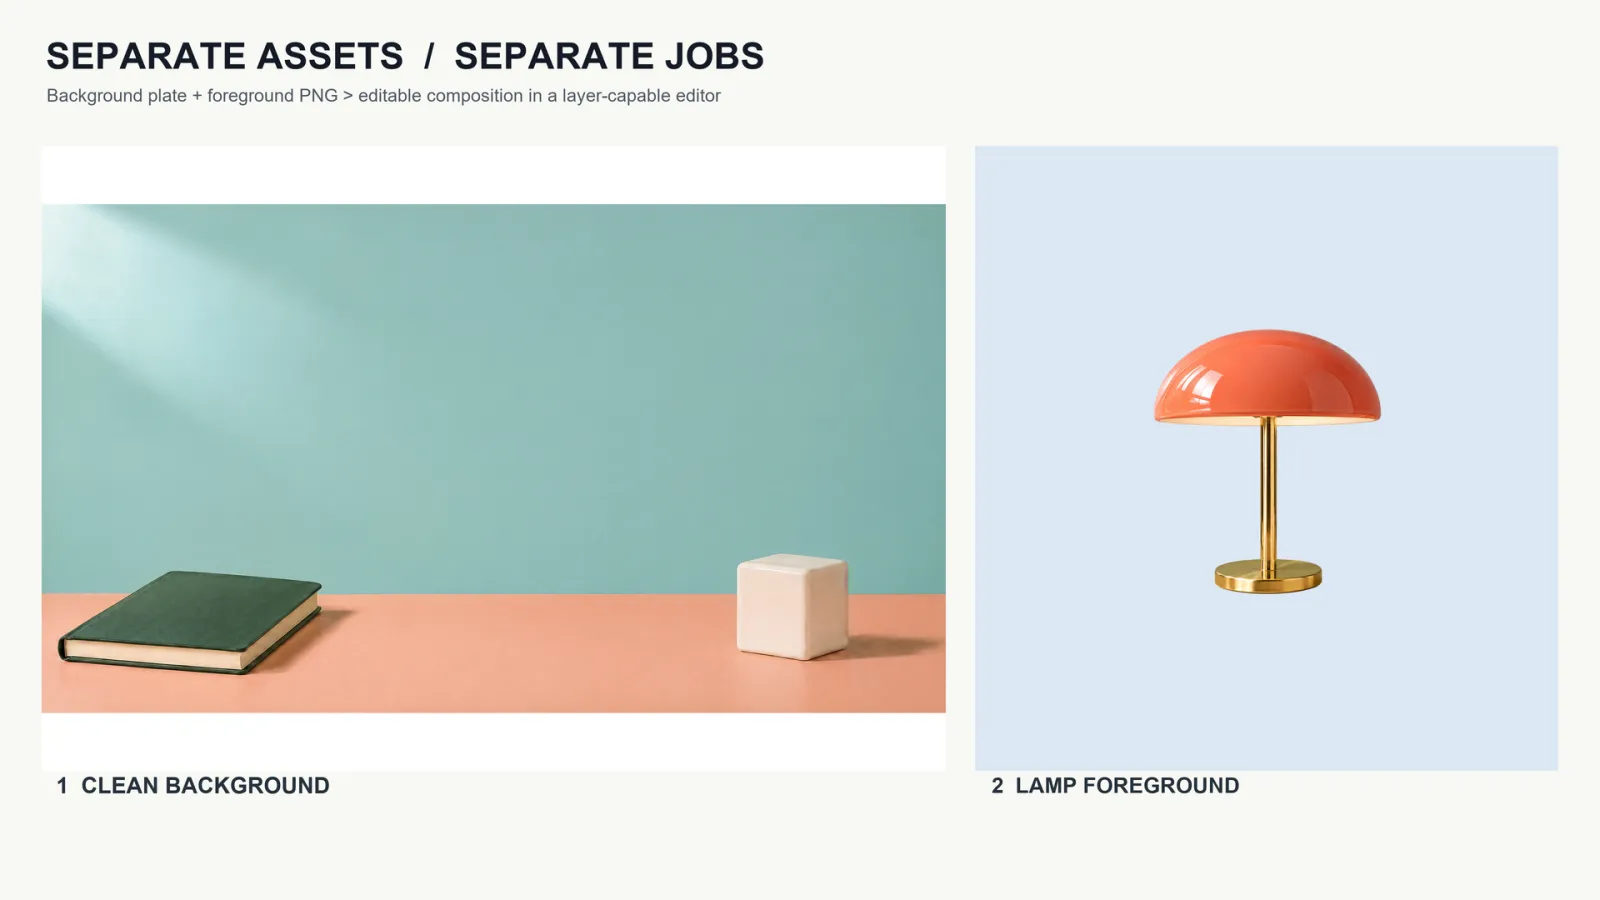
Separate components for a compositing workflow. This board does not claim native PSD export or automatic layer decomposition.
Check the whole image before exporting
Inspect the shade edge, brass highlights, notebook position, cube corners, and tabletop line. Review at full size and at the intended display size. If an unrelated area changes, return to the original reference and narrow the request. Avoid building a chain of revisions on an increasingly altered image.
Keep the source, selected edit, cutout, and background plate as distinct files. Budget for those separate operations and rejected candidates using the current account credits. A completed layered composition also includes manual placement and review time.
Turn the approved still into the next asset
Once the image passes review, use the PixTV video canvas for a product motion study. For a multi-shot project, bring the approved outputs into the PixTV clip editor. Preserve the still as the visual reference so later motion work starts from the accepted design.
Frequently asked questions
Is a prompt edit the same as inpainting with a mask
The inputs differ. A text-only edit describes the region; a mask or markup also locates it. Check the controls your editing surface supports.
Does GPT Image 2.6 export native Photoshop layers
This workflow prepares separate images for a layer-capable editor. It does not establish native PSD export or automatic layer decomposition. Transparency and editable document layers are distinct.
Will the unselected area remain pixel identical
Do not assume that. Compare the surrounding scene after every candidate. For strict pixel preservation, retain the source outside a reviewed composite boundary in an appropriate editor.
Can I change several details at once
You can request it, but diagnosing failures becomes harder. Approve one bounded change first, then start the next revision from a saved version. Record which details are intentionally different.
Why does an isolated lamp still need review
Background removal or regeneration can affect edges, reflections, and geometry. Compare the result with the source before placement, particularly when product accuracy matters.
Which files should I keep for later edits
Save the source, accepted revision, foreground PNG, clean plate, prompt, and settings. Save a layered project separately from its flattened delivery image.