Make a vertical AI short drama by turning one conflict into a few visible story beats, preparing the cast and location, and generating the required shots separately. Build the final sequence around the approved dialogue and reactions. A short script becomes usable production material when each line has a visual consequence and each shot has a clear place in the edit.
Turn the script into a scene the audience can follow
A vertical drama needs more than an opening surprise. The viewer must understand who wants something, what prevents it, and why the next action follows. Start with one location, a small cast, and a conflict that can be expressed through a prop or a visible decision.
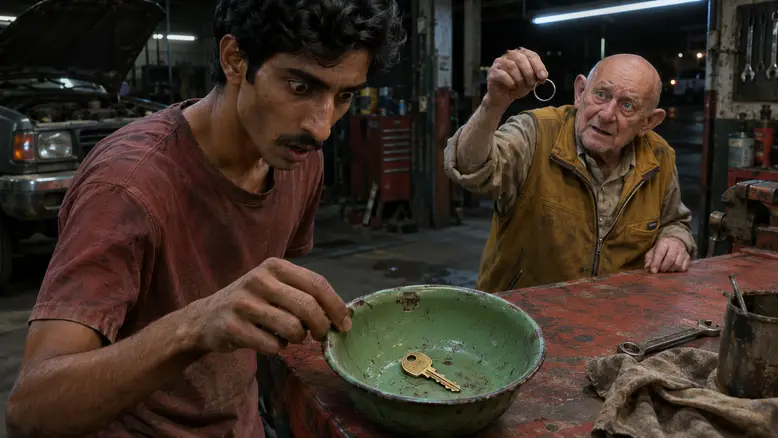
The original plan here follows Ravi, a young mechanic, and Otto, an older customer, at a repair-shop workbench. Otto presents an empty key ring. Ravi finds a key in a green bowl, then notices a red envelope underneath it. The key answers the first question; the envelope creates a new one.
Write the visible actions before adding camera language. “Ravi realizes something is wrong” leaves the image undefined. “Ravi stops lifting the bowl and looks at Otto” gives the scene an observable turn. Use the wider AI short-film workflow for production context; this guide concentrates on a single vertical dramatic scene.
Keep the first version small enough to revise. A new location, extra character, moving vehicle, and long speech all add dependencies. Add them only when they do work the simple version cannot accomplish.
Shape four beats before assigning runtime
Use a hook, a problem, a turn, and a new question. These beats organize information; they do not require four equal-length clips. Read the dialogue aloud with the intended pauses and leave time for the prop to be understood.
For a planned thirty-second edit, allocate provisional time to each beat, then revise after assembling the material. Thirty seconds is the editorial target for this example, not a claim that a model produces the finished drama in one request.
| Beat | Provisional edit time | What the audience learns |
|---|---|---|
| Hook | Opening few seconds | Otto has an empty key ring |
| Problem | Next short exchange | He believes the key has disappeared |
| Turn | Middle reveal and reaction | Ravi finds a key in the bowl |
| New question | Final beat | The envelope underneath changes the situation |
Keep dialogue specific. Otto can say, “That ring was not empty when I arrived.” Ravi can answer, “Then why is the key here?” The prop and the reaction should carry the implication; a narrator does not need to explain every visible fact.
The ending should change the audience's understanding, even when it leaves a question open. An arbitrary mysterious object added at the last second feels less earned than an envelope revealed by an action already in progress.
Build a vertical shot list before generating movement
Prepare the shot list in story order: the key-ring insert, Ravi at the bowl, a reaction, and the envelope reveal. Add a shared view only if the audience needs help understanding where both people stand. The storyboard guide explains how the written decisions become reference frames.
Compose for the final vertical image. Keep the key, hands, faces, and the relevant table area inside the usable frame. Leave space for captions without making the main action so small that it disappears on a phone.
A horizontal review board can compare four planned shots, but it is not the vertical master. Prepare each starting frame in the intended output shape rather than assuming a later crop will preserve both the face and the prop.
Record screen direction. Ravi stays near the bowl and Otto stays opposite him until the story explicitly changes their positions. A reaction shot should follow the established eyeline, not introduce a new side of the workbench accidentally.
Prepare the cast and references in PixTV
Use image generation to establish Ravi, Otto, the empty repair bay, the green bowl, and the key. Ravi's narrow face, wavy dark hair, sparse moustache, and brick-red shirt should remain distinct from Otto's rounded bald head, large ears, clean-shaven face, and mustard vest.
Keep the envelope and its location in the production notes even before it becomes visible. An object appearing for the first time still needs continuity. Decide how it fits beneath the bowl and how much of it the final reveal should show.
Use a reference only for what it establishes. A front view of a key cannot prove the design of its unseen reverse. A wide repair-shop image can establish the room, but it may not contain enough face detail for a close-up.
Generate one dramatic decision per shot
Move an approved frame into video generation when the chosen model supports it. Check its actual reference, duration, and sound options. Do not use an unverified feature as a required step in the production plan.
Step 1 test the opening question
Begin with the empty ring. A small hand movement or a held close-up can establish the problem without moving the camera. Keep enough visible room to identify the object. An elaborate pullback adds little if the viewer still cannot see that the ring has no key.
Step 2 direct the discovery
A visual brief for the discovery could be:
Ravi looks into the worn green bowl on the rust-red workbench and pauses. The single brass key remains visible inside. Keep his face, brick-red shirt, bowl position, and overhead white light unchanged. Restrained movement, steady camera, no extra hands or new objects.
If the contact action is unreliable, separate looking from picking up. A correct insert followed by an accurate reaction can communicate the discovery with less invented hand interaction.
Step 3 make the reaction answer the discovery
Ravi should react after he sees the key, and Otto should respond to Ravi rather than to the camera. Approve the direction and intensity before adding visible speech. A small glance can carry suspicion more clearly than a large shocked expression.
For dialogue, use an approved recording or a verified speech workflow. If visible mouth synchronization is not available, play the line over the listening character, the key insert, or another relevant view. Keep each voice assigned to the same person.
Step 4 reveal the next question
The envelope reveal needs a legible change in information. Prepare the under-bowl state before generating movement. If lifting the bowl changes its shape or the character's hand, use a separate close-up of the revealed envelope and cut at the strongest moment of coverage.
Do not invent a written message that the viewer cannot read. The envelope itself can be the question. Important text belongs in controlled, editable postproduction rather than an unreliable generated inscription.
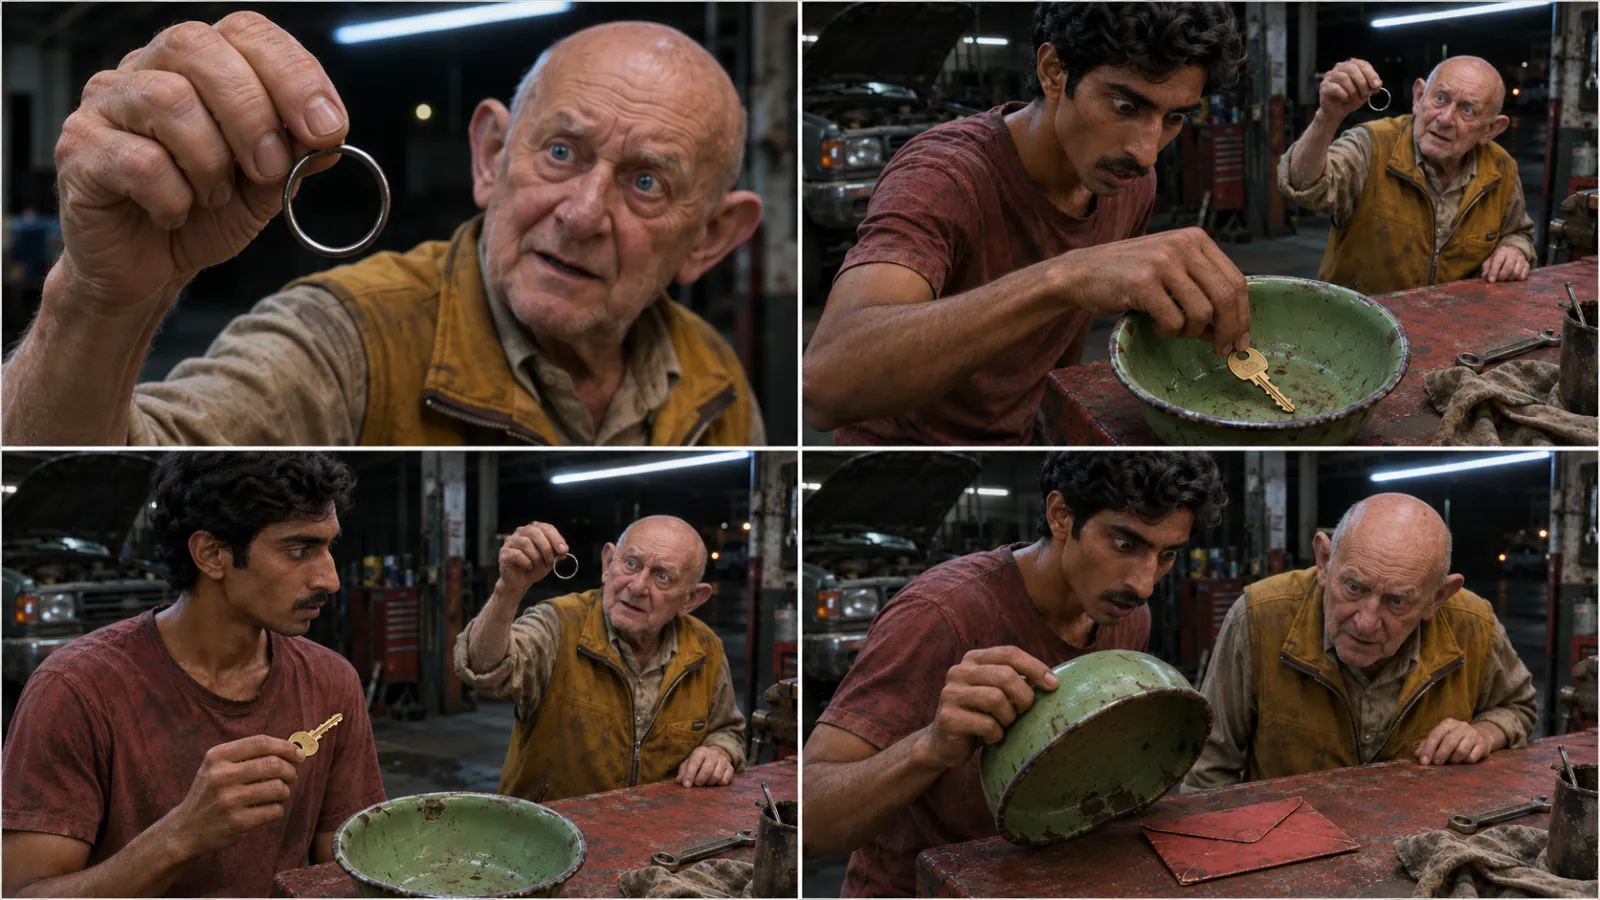
Story plan: each frame changes what the audience knows, from the missing key to the envelope beneath the bowl.
Step 5 check the connection before expanding
Watch the discovery and its reaction together. Check whether the gaze reaches the key, whether the pause has a cause, and whether the following angle belongs to the same table. A better-looking isolated take can still weaken the drama if its timing contradicts the adjacent shot.
Keep a short note identifying the first failed relationship. Correct the eyeline, reference, action, or cut that caused it instead of rewriting every instruction simultaneously. This makes the next attempt easier to evaluate.
Assemble the scene around information and sound
Bring the accepted material into the video editing workspace, using the finishing controls currently available. Start with the dialogue and required visual beats, then remove pauses that do not add tension or understanding. Use an external editor for any required operation the current workflow does not provide.
Review the sequence with the screen small. The ring, key, and envelope must remain identifiable, and captions should not cover the hands. Watch once without sound to check the visible cause and effect, then listen without pictures to check voice assignment and unfinished phrases.
Estimate attempts by setup. If four setups each need three attempts, the plan includes twelve video attempts, plus references, audio, and assembly. This is a workload example, not a PixTV price or production-time promise. Use the selected settings' displayed charges and include discarded material.
Once the scene works, save its references, script, accepted clips, audio, and edit version. A later episode should begin from this production package. Start in PixTV with the empty ring and the key discovery; make that connection readable before building the rest of the drama.
Frequently asked questions
Can I paste the complete script into one prompt?
A single request does not guarantee the shots, performances, timing or edit. A shot list makes those decisions visible. Test the opening and a difficult connection, then produce the remaining coverage from approved references.
Does a vertical short drama need lots of dialogue?
No. A visible problem, a reaction and a changed situation can carry a scene with few words. Read the lines aloud and leave room to understand the objects. More speech can crowd out the story.
How long should each generated shot be?
Long enough for the action and usable room around the cut. Choose according to performance, pacing and available controls. A thirty-second edit target does not require equally long shots or maximum-duration generations.
What should I do when the hand action fails?
Use an accurate object insert and a clear reaction, or replace the action with reliable recorded material. Review the connection in context. An incorrect key, hand or bowl can confuse the story.